DIY Paving Guide
Required Tools and Materials
- Quarry rubble
- Bedding sand
- Pavers or blocks
- Gloves
- Wheelbarrow
- Shovel
- Steel screed rails/straps
- Pick
- Steel screed bar
- String lines
- String line level
- Steel pins
- Spirit level
- Hammer
- Straight edge
- Trowel
- Broom
- Blower (leaf) for cleaning pavers
- Compactor plate
- Tape measure
- Rubber mallet
- Brick saw
- Finejoint sand
- Concrete mix (edge restraint)
Before You Start
- Always wear eye protection when cutting pavers
- Wear ear muffs when you are using a compactor or brick saw
- Bend your knees when lifting heavy pavers
- Wear work boots to protect your feet and gloves to protect your hands
- Slip, slop, slap if you are working in the sun and keep your fluids up.
Planning
Before beginning, it is important to have a clear plan worked out. The first step is knowing the exact dimensions of the area to be paved. Measure out your ara and mark with string or paint. Once you have measured and measured again, you can start to draw up your plan.
Pavers can usually be laid around your house without council approval. However, if you’re doing a driveway or working in an area where your paving encroaches onto council verges, you may need to contact your local council. Some of the newer residential communities have covenants covering the use of driveway material. If so get authorization before proceeding.
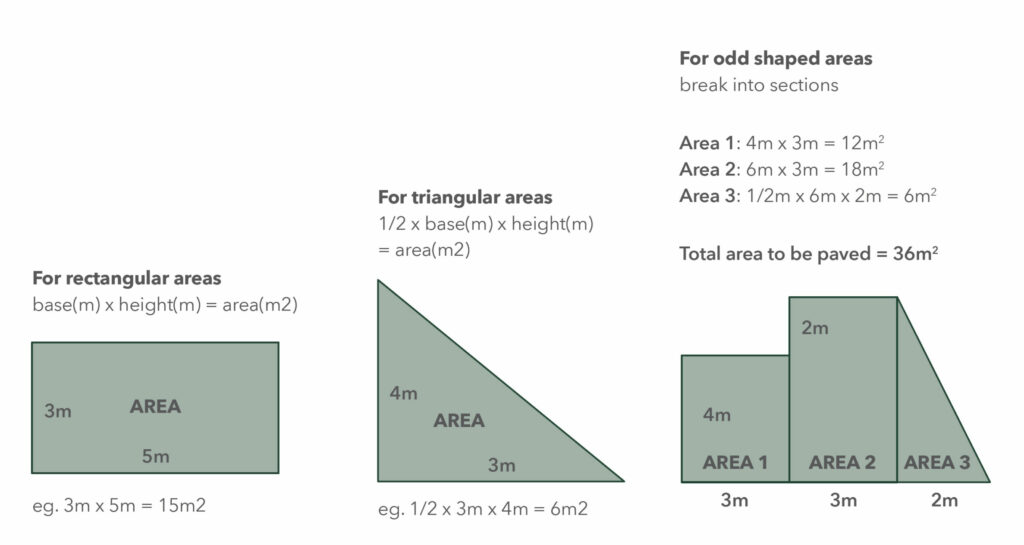
How many pavers will you need? Using the helpful diagrams below, measure the desired space you would like to pave. This will give you a total square meter figure (Length(m) x width (m) = area (m2)
To know the amount of pavers to order, you will need to know the area. To calculate the area simply multiply the length x the width. Eg. length of 10m x width of 2m = 20m2. When planning, make sure you allow for stormwater to run off and think about any other services you may want to be laid under the paving such as irrigation or electrical for lighting before you begin.
Preparing to Pave
STEP 1: Preparing the site
Correct preparation is the most important part of your paving project and if done correctly, will save you time in the long run and make sure your pavers will look great for years to come.
Excavation
In most cases, it may be necessary to excavate the area to be paved. The depth of this excavation will depend on the thickness of the paver you have selected.
The depth of your excavation should be as follows:
(depth of paver) + 30mm bedding sand +75mm compacted road base (for walkway) or 150mm compacted road base (for driveway = depth of excavation required.
Once you have worked out the desired finished surface level:
- Drive four stakes into the ground on the corners of the area to be paved and run string lines between them at the finished surfaced level.
- Level the strings using a string line level.
- Remove all grass from the area to be paved.
- Excavate the ground to the required depth.
- The prepared ground must be even.
- Compact or replace soft spots in the ground.
- Spread and compact road base if paving a driveway area.
Rainwater must flow the side of the house; the pavers must be below the damp proof course. Never cover damp proof courses or air vents.
Check evenness and depth of base by measuring from string line. The finished surface level of pavers may be at or above ground level.
STEP 2: Subgrade
Correct base preparation is perhaps the most important part of every paving project. The sub-grade is the natural soil that the paving is supported on. This should be firm and all top soil and vegetation removed. String lines should be used to determine the finished level. The finished height of the sub-grade should be trimmed to within 25mm of the desired level and compacted if necessary. Backfill for service trenches should be compacted in layers no greater than 150mm. Correct preparation of sub-grade reduces the incidence of shrinking and rutting.
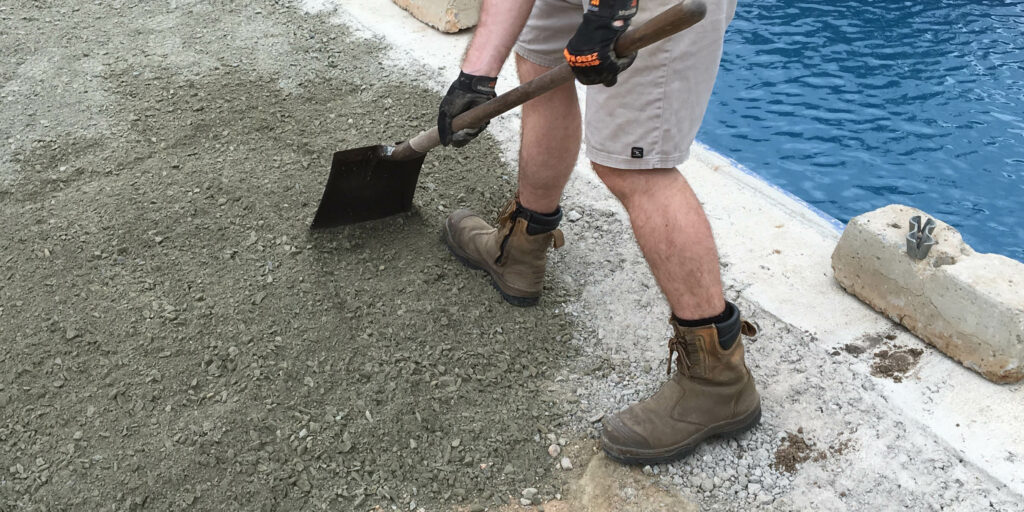
Roadbase
The roadbase is important quarry rubble used to build up areas, set levels and provide a strong stable layer to support the laid pavement. A 75-80mm thick layer for walkways and 100-150mm thick for driveways to 10mm of the desired level to allow for compaction.
The roadbase for walkways may be reduced on sandy or non-reactive sub-grades; however, it does not add considerable strength to the pavement and is recommended for a ‘first-class’ job. All roadbase material should be compacted with, at least, three passes of a mechanical vibrating plate compactor.
The roadbase material extends past the outer perimeter of the paving work. This means that the edge restraint lasts longer and reduces the incidence of outer perimeter paving subsidence, so common with standard paving practices.
Bedding Sand
The next step is to lay bedding sand evenly over the area to a depth of 30mm. Bedding sand (washed concrete sand) is required under all paving. 1 tonne will cover approximately 20m2 i.e: 20m² x .03(30mm) depth m = .6 Cubic m³
.6m³ x 1.8 = 1.08Tonne
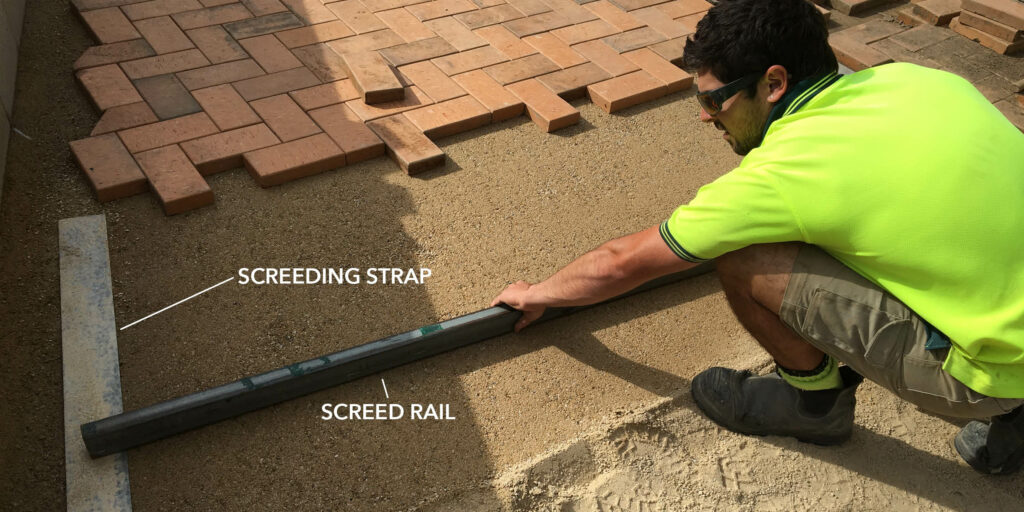
STEP 3: Screeding the bedding Sand
A 30mm layer of bedding sand is required as the final preparation for laying pavers. The levels for this base will be reflected in the finish the paving, so it must be accurate. The most effective method to level the bedding is to use two screeding straps set accurately in the bedding sand to the required levels and placed approximately 1m to 3m apart. The screeding straps are about 100-125mm in width and 2-3mm in thickness. Length of the straps can vary from 1.5 meters to 3 meters long.
The screed rail is then used to level off between the screeding straps. The straps are then removed from the sand is smoothed off with a trowel prior to laying the pavers. The bedding sand is not a levelling medium; the thickness must be kept consistent across the paved area to avoid uneven settlement of the paving.
Remember the level of the bedding sand will determine the finished levels of the paving so take your time to get it right and allow for necessary falls.
Always lay pavers in lines using a string line if necessary.
STEP 4: Laying the Pavers
When laying pavers, it is generally best to start in a corner or along an edge such as a house footing.
Place the pavers, using the desired pattern, on the screed sand. Take care to ensure that all pavers are level. By using string lines and regular visual checking of the paving, it is possible to keep the joints straight. Laid pavers can be adjusted with a trowel to correct any minor errors in the joint alignment. Some pavers should be laid with a 2-3mm gap between each paver.
Always work from the top of pavers that have just been laid so as to avoid disturbing the screeded bedding sand.
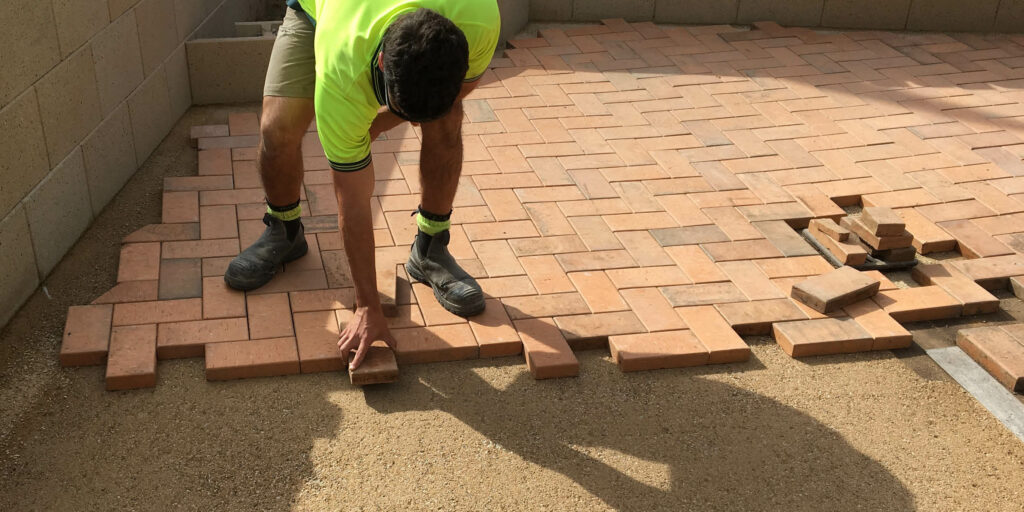
Cutting the Pavers
Leave cutting and placing of edge pavers until the last step. Carefully mark the pavers to be cut with a texta and number the back of them. For a quality professional finish, use a diamond base brick saw, remembering to wear proper safety equipment when cutting pavers. Put aside any broken or chipped pavers and use these for cutting if possible.
STEP 5: Edge restraint
Where the paving does not abut a solid structure, an edge is required to prevent the pavers spreading or opening up.
Finishing unsupported edges of the paving with a concealed concrete edge strip is the most common method used to support the paving.
The edge restraint should be kept at least 10mm below the finished level of the paving to allow for compaction. Alternatively, the edge restraint can be an exposed concrete strip, or the edge can be set on a concrete base.
Final preparation
The completed preparation for the paving should be firm and level with a fall to allow for rainwater run-off. The use of string lines will help maintain the line and levels to ensure accurate preparation. The prepared surface level should not deviate by more than 10mm over a 3m length from the required profile.
Laying Patterns
Depending on the overall look you would like to achieve and the area you are paving, there are many different styles of laying pavers.
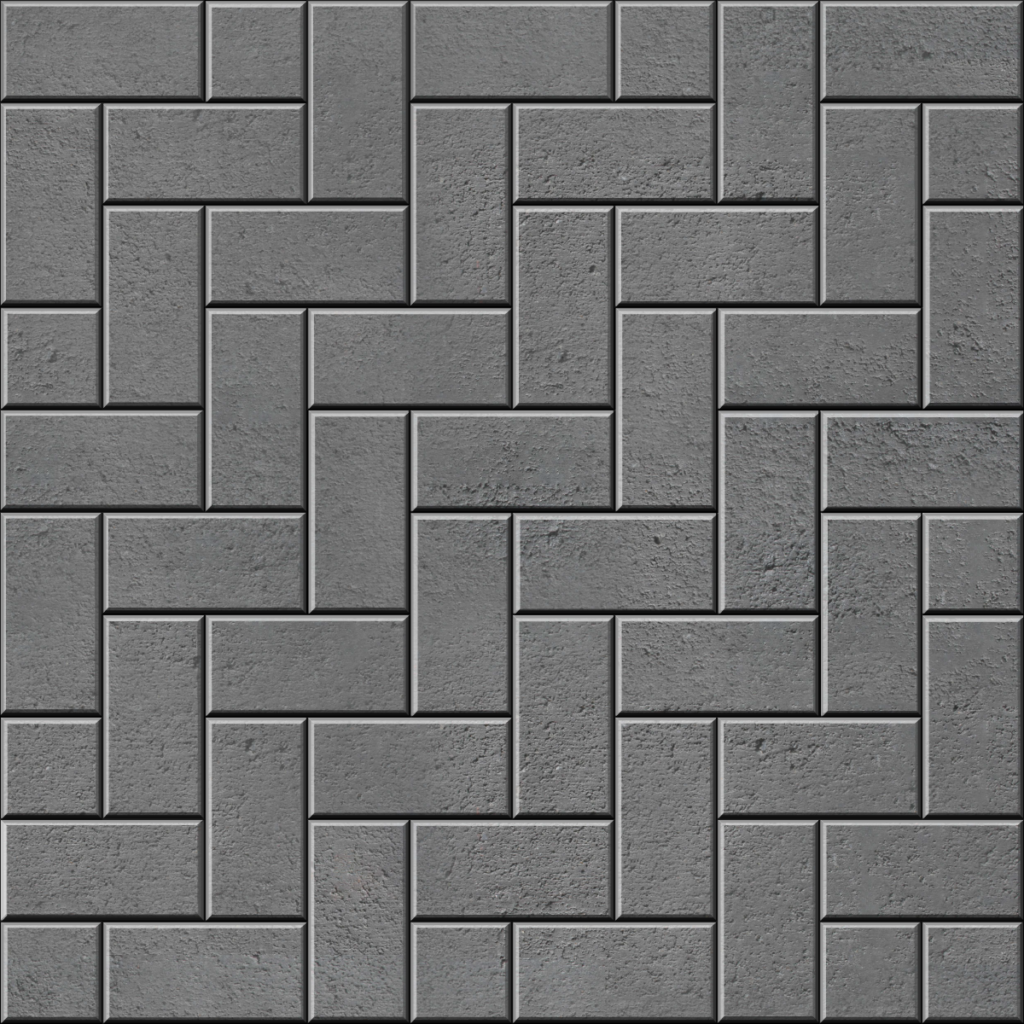
Herringbone 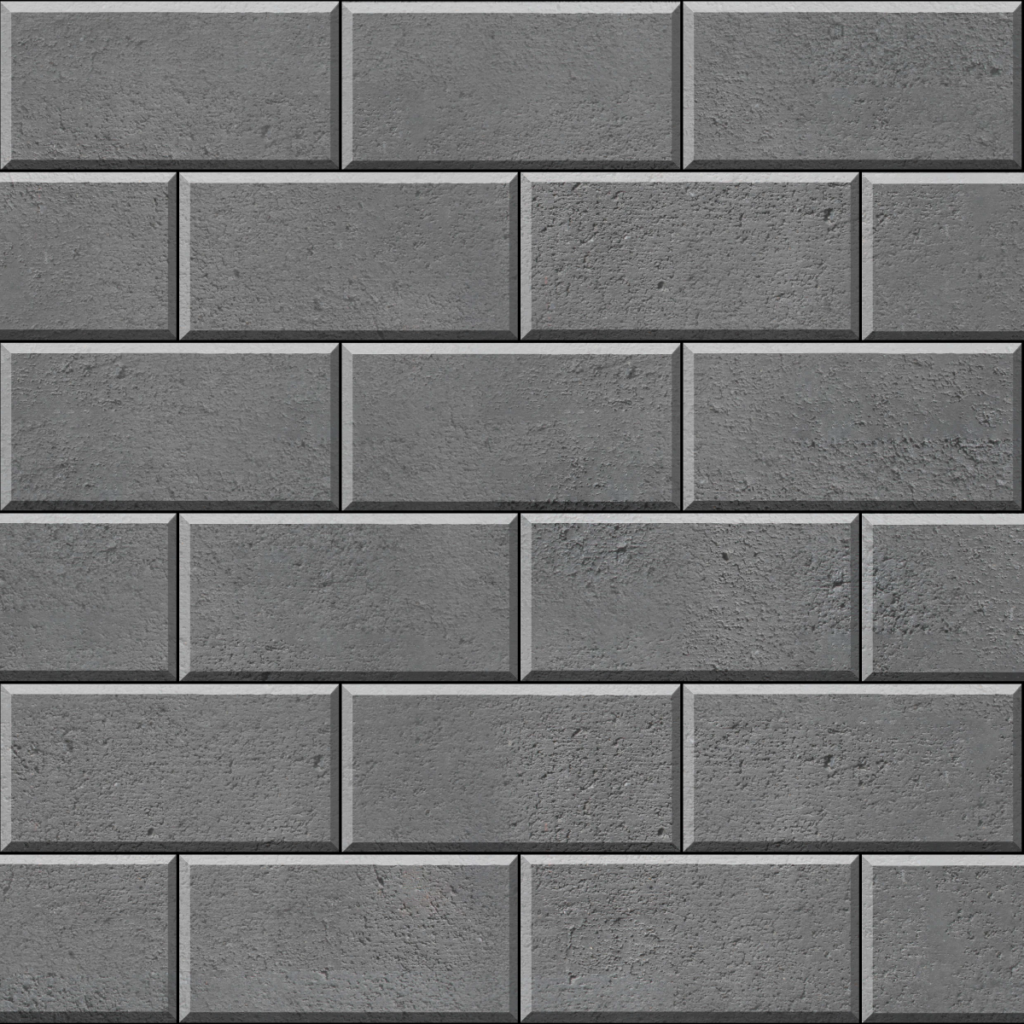
Stretcher Bond / Brick Bond 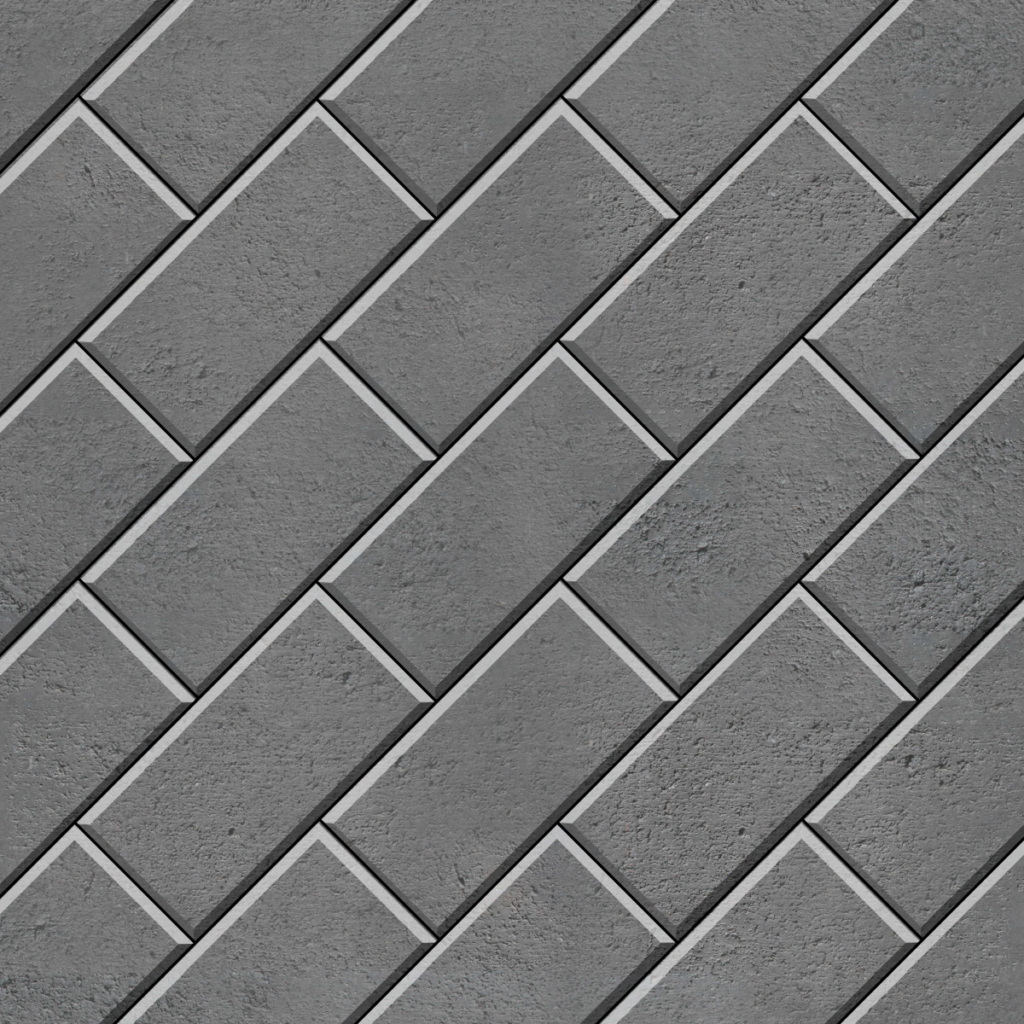
45 Stretcher Bond 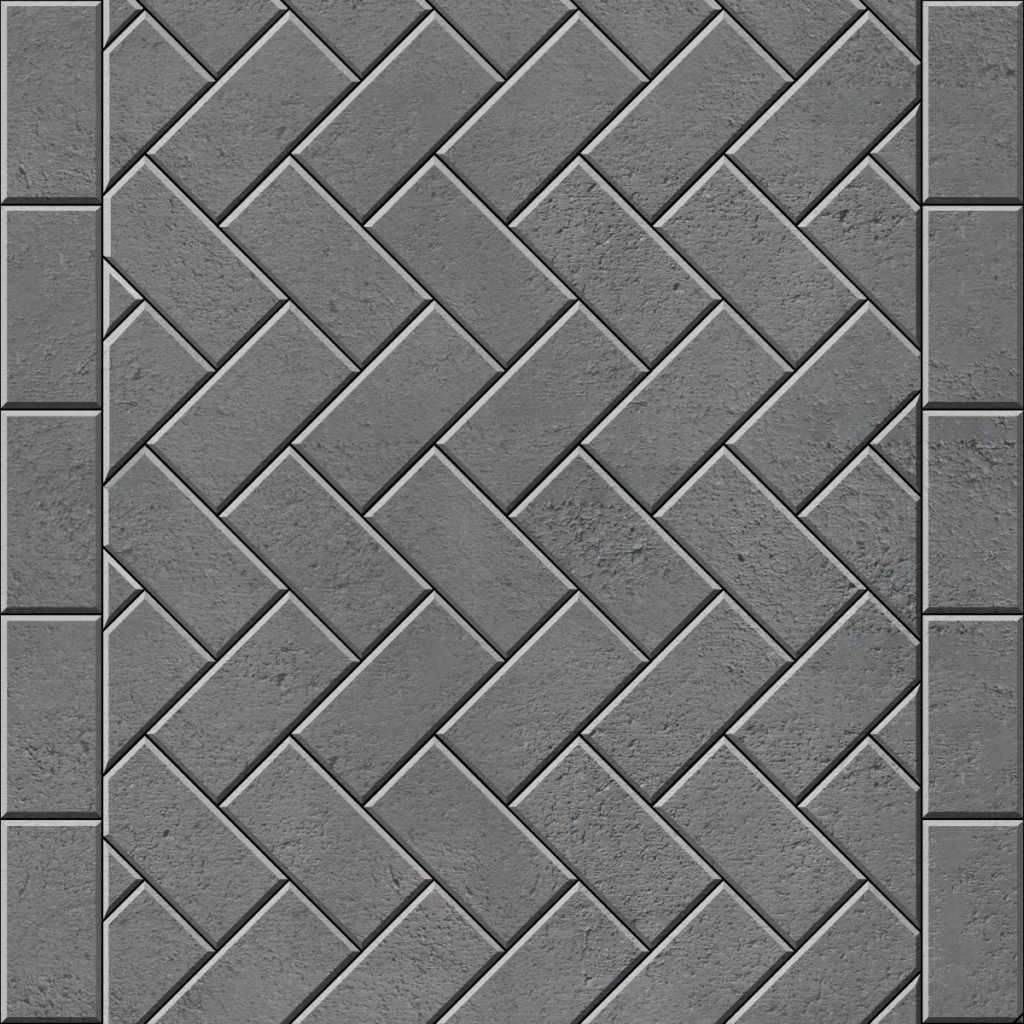
45 Herringbone with Flat Header Course 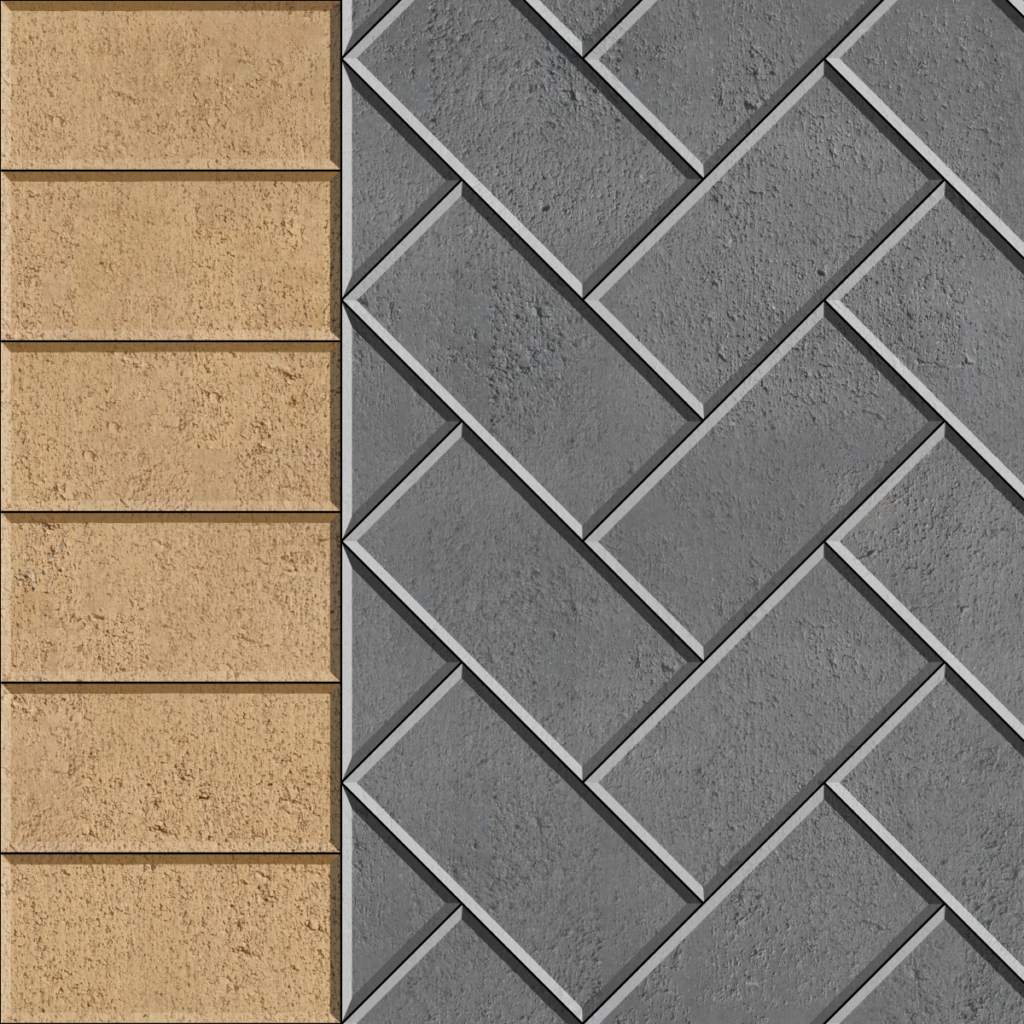
45 Herringbone with Flat Header Course 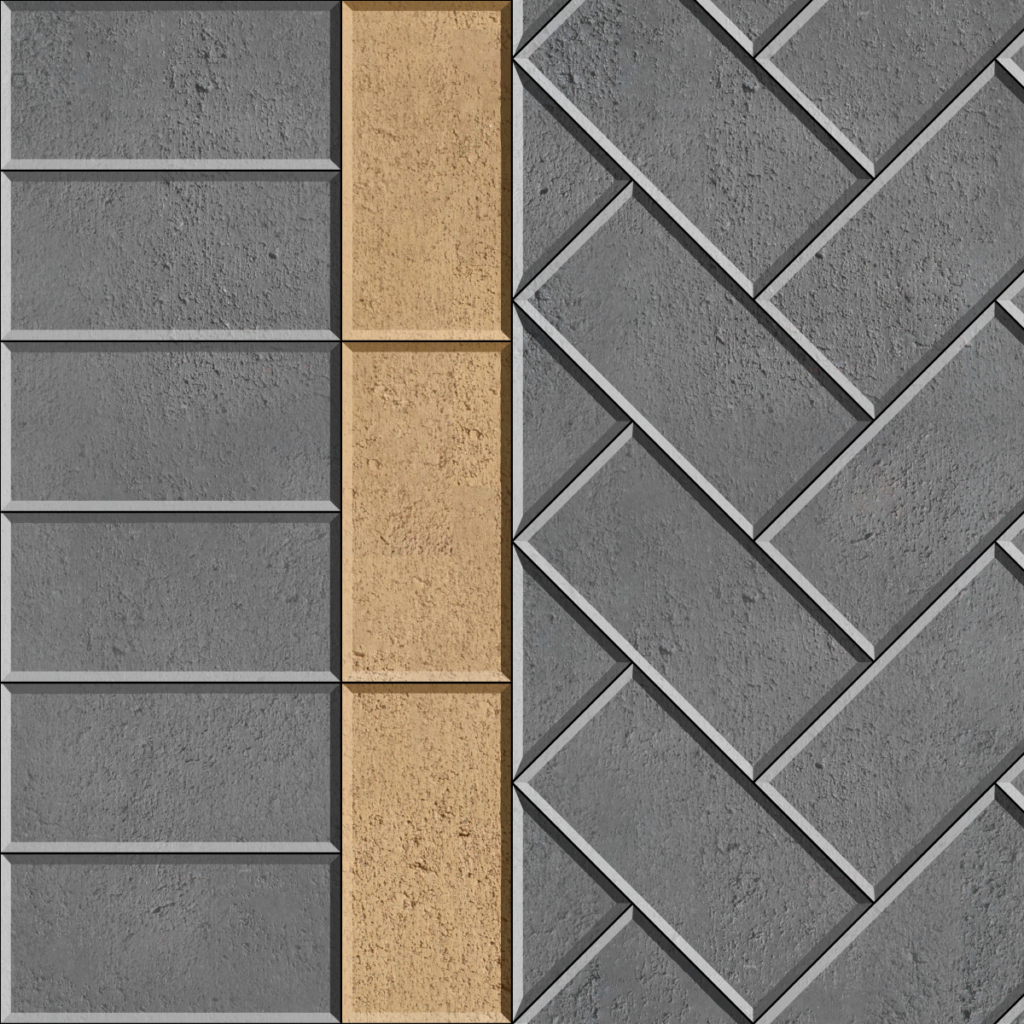
45 Herringbone with Contrasting Stretcher Inlay and Header 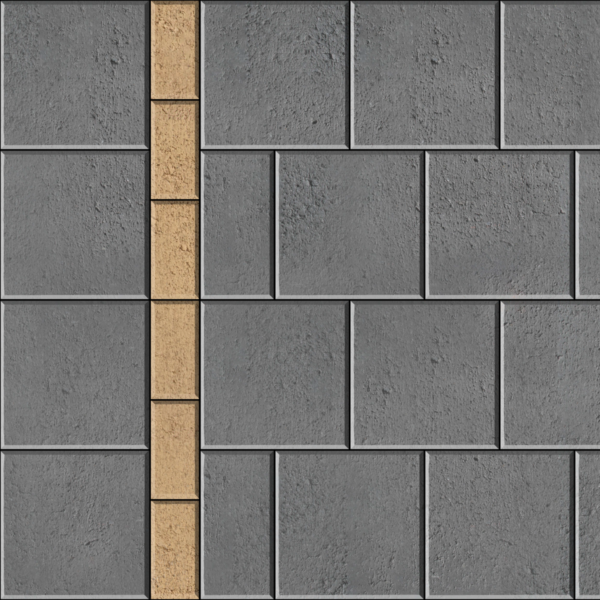
Stretcher Bond with Contrasting Stretcher Inlay and Header 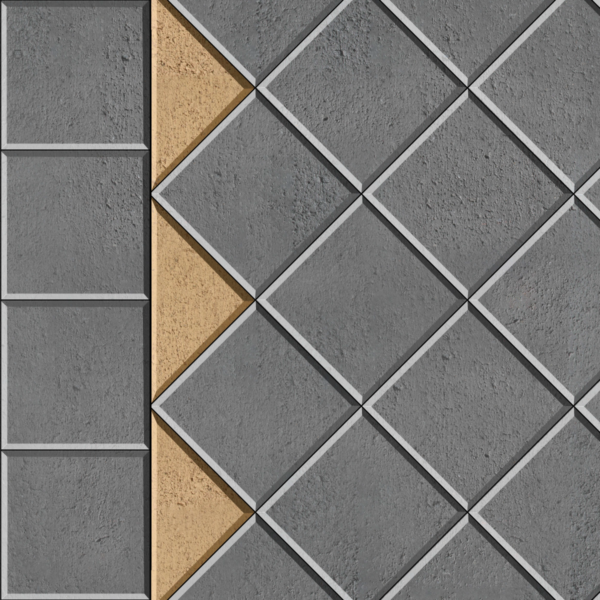
45 Stack Bond with Contrasting Triangle Cut Inlay and Header 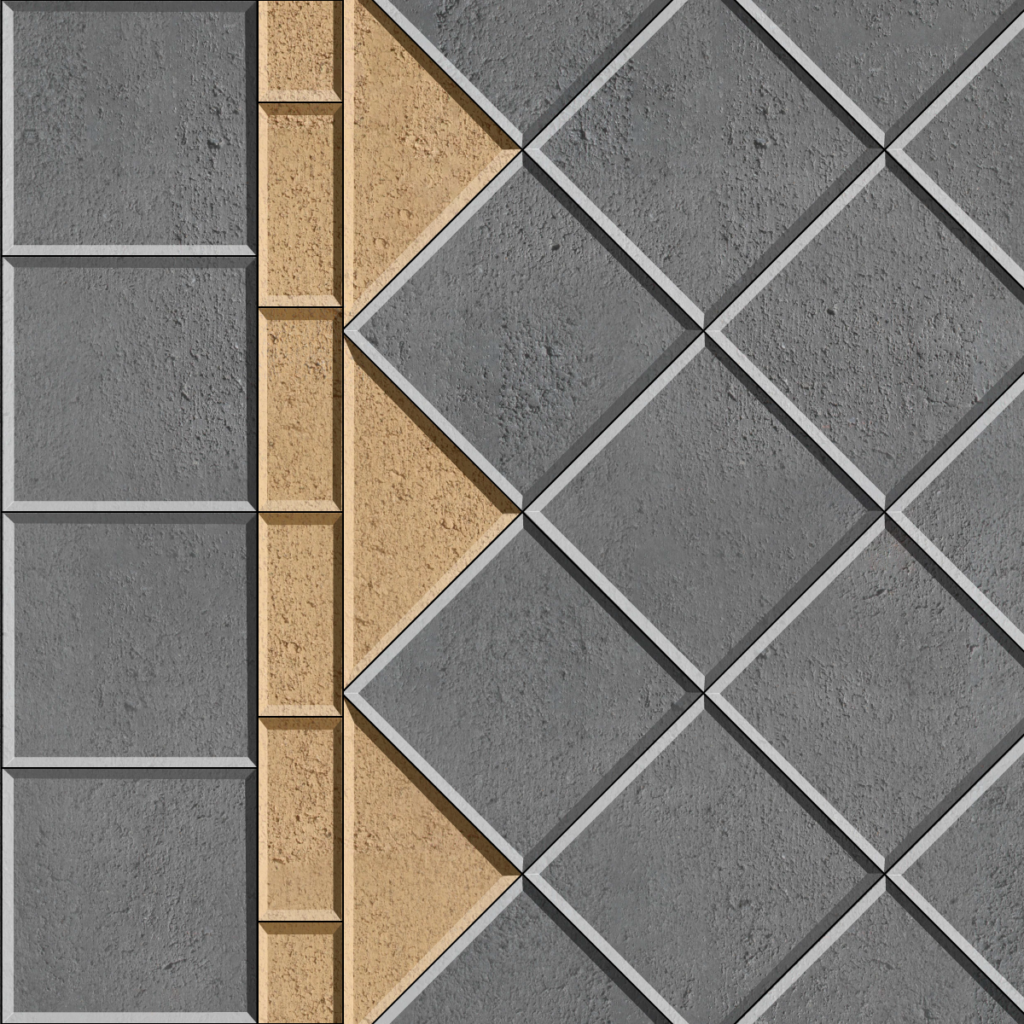
45 Stack Bond with Contrasting Stretcher Inlay and Header
Filling the joints
Dry jointing sand should be spread over the surface of the pavers and swept into joints in the paving. Compacting of pavement should then be completed to lock the pavers in before brushing off the excess sweep sand.
In some instances, it may be necessary to make an additional pass over the paving with the broom and re-compact the pavers to ensure all joints are thoroughly filled.
Spacing the pavers to keep straight lines.
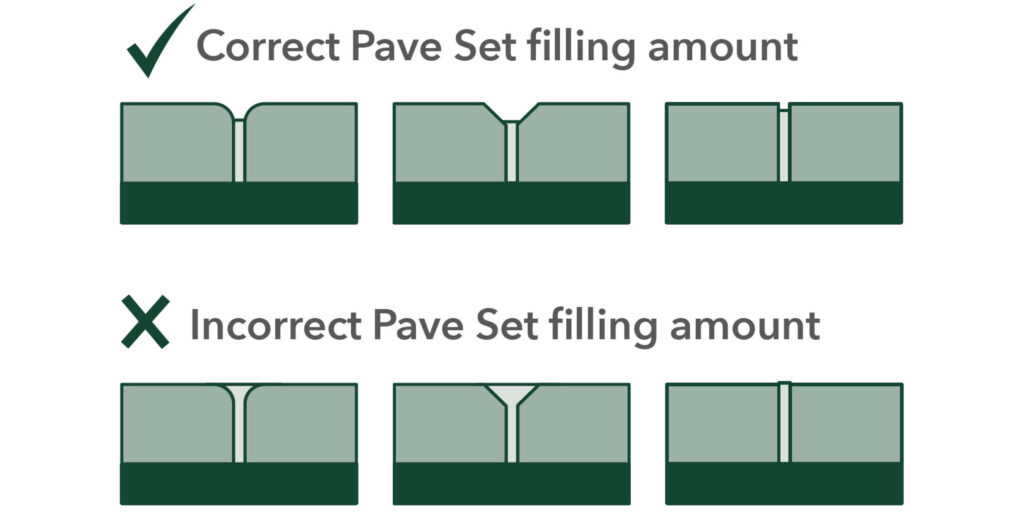
STEP 6: Pave Set
If paving a driveway, footpath, patio or any high foot traffic area, Pave Set is required to fill the gaps between pavers, blocks, and bricks to secure their positioning and eliminate movement.
Made from a selected blend of sand, binder and gelling agents, Pave Set does not set hard; rather, it gels the area between the pavers and may require maintenance in certain areas over time.
Before using Pave Set
Before applying Pave Set to your paved area, check the following list of precautions.
Pave Set should not be used:
- If rain is forecast within three days of application
- If high winds are expected within three days of application
- On pavers that are not on a well-drained sub-base
- Around swimming pools
- In areas that are constantly wet as it does not prevent water penetrating gaps
- On steep inclines
- In gaps wider than 4mm
Ensure that the paved area is dry by covering a small area with plastic for 24 hours before application. Inspect the underside after 24 hours to ensure no moisture. This is essential if pavers are recently made or have been subject to recent rain.

Top layer: Jointing sand
When you lay pavers, it’s recommended that you leave a 2 – 3mm gap between pavers, jointing sand is broomed into the gaps. A 20kg bag should cover between 10 – 20m2 at the recommended 2 – 3mm gap.
Paved area ____ (m2) x 0.067 (allows for 3mm joint spaces) = ____ 40kg bags of jointing sand required
How To Pave
Applying Pave Set
1. Make sure that the paved area is dry and clean of any loose material such as dirt or sand.
2. Spread Pave Set evenly over the surface of the pavers, and then sweep the Pave Set into the gaps Note: A good practice is to pour the Pave Set along the joints to minimize the potential for segregation of the polymer from the sand.
3. Avoid sweeping the Pave Set over long distances, as this will cause segregation and inconsistent gelling.
4. Compact the Pave Set into the joints using a vibrating plate or rubber mallet.
5. Apply more Pave Set, sweep and compact until joints are filled. Please note that Pave Set will only work effectively if applied correctly between the vertical walls of the pavers.
6. Thoroughly clean the pavers by sweeping with a fine bristle broom to avoid the polymer and binder from sticking to or staining the surface of the pavers during wetting.
Note: Using a blower ensures that all residue is removed from the top of the pavers.
7. With a fine mist spray, wet the paved area until Pave Set has efficiently absorbed the water through its entire depth. Note: For best results, target areas of no greater than 2m2 at a time before moving on to the next area. Do not flood the area or use high pressure, as this will impede the gelling process.
8. Allow the Pave Set to dry and gel for at least two days (longer during cooler months) before sweeping or allowing heaving traffic on the area. Note. It is important to allow the approximate drying time for Pave Set to work effectively.
9. You may need to top up gaps every year, especially after heavy rains. To do this clean out the gap before applying the Pave Set and soak again with the steps above.
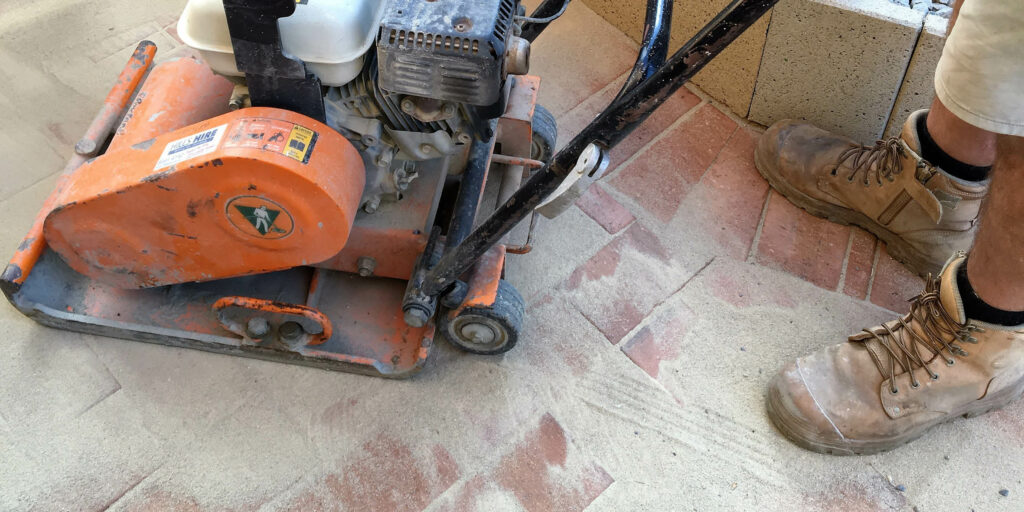
STEP 7: Compacting the pavers
After the pavers have been laid and dry jointing sand spread over the surface, (and into the joints), the pavers should be compacted. This will bed the pavers down and assist in ensuring all the pavers are level and any minor imperfections are rectified to produce a professional finish to the job.
For a more professional finish, it is better to hire a mechanical vibrating plate compactor fitted with rubber or carpet base.
A layer of sweep sand spread over the surface of the pavers will protect the pavers from damage during the final plate compaction of the laid pavers
Important points to remember
Termite Control
Correct building standards must be adhered to whilst paving around your home. If not, an infestation may occur from subterranean termites, wood-boring beetles, and fungi.
Damp Proofing
Ensure the paving level around your home is a minimum of 50mm below the damp-course level of your house or to local building codes. This prevents excessive moisture from breaching the damp-course membrane.
Surface Water Drainage
Ensure the sub-grade is graded correctly to adequately direct service water away from your home. The paving height around the overflow relief galley must be a minimum of 150mm below the lowest sanitary fixture. If these requirements are not followed, raw sewage may flow inside your home.
Stormwater
All pipework, sumps, grates, and inspection points must be back-filled with filling sand and compacted. All storm-water installation must comply with minimum depth requirements. Correct storm-water installation and backfill reduces the incidence of sinking or rutting over trenches.
Tips & Tricks
Laying pavers can be tricky to master so to achieve a professional finish, we have compiled some quick tips and tricks.
- Use string lines where possible.
- Ensure you lay the grain running the same way.
- When laying pavers work off as many pallets as possible (three or more). This will allow you to evenly blend the product.
- For best results, choose pavers down the sides of your pallets (not across) randomly. This will give a more even blending.
- Imagine the finished product.! Have all half cuts or full pavers at doorways and focal points, when setting out your paving.
- There is no such thing as too much drainage!
- When laying up a hill, start at the bottom and sand in as you go. This will help avoid lines shifting with gravity.
- The screed rail and straps method of preparing sand for laying is most effective (see Step 3. Screeding the bedding sand)
- Always use coarse washed river sand or similar bedding sand for paving projects.
- Ensure you order everything you need at once and set aside an allowance for breakages and cutting.
- Use stakes to mark corners of the area to be paved and run a string line between them. The level of the string should be the level at which you want your paving to be. You can use the spirit level to check the level.
- Do not keep the entire surface on a single level. You need to give a small slope for the water to run off. Be careful while setting the direction of the slope as the slope should be away from your property.
- If you are paving right next to your house, use a plastic membrane against the concrete foundation that has been exposed.
- Invest in a drain at the low point of the slope so that water does not accumulate between pavers. If water is allowed to remain between pavers, it can reduce stability and also bring efflorescence.
- To prevent washing out of the bed sand, restrain the edges of the paving. Opt for reinforced concrete or mortar restraints for strong support.
Paving is simple, and with the endless option of pavers, you are surely going to enjoy the experience!
Top 10 Tips for Easy Delivery of Pavers
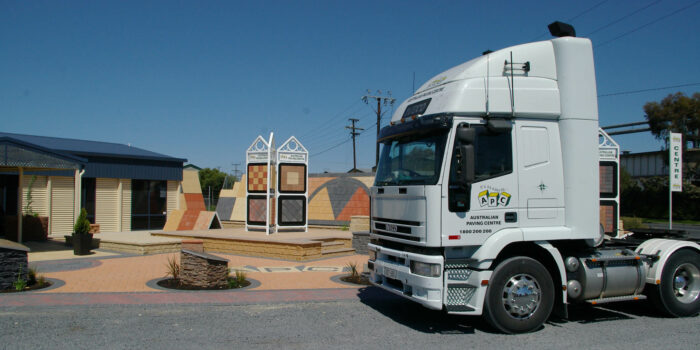
Delivery of your pavers, bricks, or retaining wall system is the first exciting step in the construction of your project. We at APC take pride in the efficient and effective delivery of our products to your site. A few simple guidelines will help us help you in placing your product where you want it when you want it.
1. Estimate accurately. We can help you estimate your requirements to avoid over or under ordering.
2. Not so fast! Have your product delivered to site at least one day before starting work. Starting work on the delivery day may lead to lost time due to waiting.
3. Take as many products as you can on each delivery. Ordering a full load ensures priority delivery and allows tradesmen to blend from multiple pallets, ensuring an even mix of colours in blended products.
4. Trucks are big! We need to know if there are any obstacles for the trucks such as clearways, main roads, one-way streets, schools, hospitals, weight restrictions, a landmark if on the main road etc.
5. Is your site prominent? Place a “site sign” on your front fence or boundary to eliminate any confusion.
6. Is the site locked? We need to know access times. If you require us to enter through a neighbour’s property, it is your responsibility to gain prior written permission.
7. Where do you want them? Inform our sales staff where your delivery is to be placed. Place markers where possible. Our tractors need at least 2.5 meters clear width and 2.1 meters in height clearance.
8. Pavers are heavy! A forklift with a pallet weighs about 5 tonnes. It is your responsibility to ensure the ground and any path or driveway that has to be crossed can take the weight. Stormwater pipes are particularly vulnerable to damage.
9. Safety first! Ensure children and pets are well out of the way during delivery. Our delivery drivers will do their best to place pallets in the locations required, but they have the final say when it comes to safety and possible site damage and damage to their vehicles.
10. Delivery times. A minimum of 48 hours is usually required to organize your deliveries. We cannot guarantee exact delivery times, as heavy vehicles can be affected by traffic and difficult sites.

shop out collection on pavers here-

Visit us at APC to pick up a free sample!
Or, send us a product enquiry or request a quote online